Showing posts with label terrain. Show all posts

29 April 2012

Cubicle Village

This is a bit late, but I'm pretty sure it's time to tell the tale of the Cubicle Village.  The story behind the village is this: As I began building more and more things, I wanted to put them in a place where they would be relatively safe from the predations of my son. So, I initially started putting the buildings in my cubicle. My coworkers liked it, with one in particular even being disappointed when I didn't add to the collection regularly.

Due to a variety of reasons, we also had some empty cubicles in our area. Well, I decided that squatter's rights ruled, so I created street tiles and began building a village, complete with cardstock inhabitants.


This went well for several months, until a director walked through doing a safety inspection. The village caught her eye, but not in a bad way. She began bringing other members of the site lead team to view the village, amazed that someone could create an entire scaled village. Even the site HR rep got in on the act, taking a photograph and displaying it as part of the lead team's safety presentation (from what I hear, it was placed in a powerpoint presentation at the end, as a lighthearted moment for a fairly successful safety audit).

The best part was my boss's boss didn't know I had commandeered a neighboring cubicle. He thought all the stuff was in my cubicle, so when he was asked "did you know about this?" he replied "Well, yeah, of course." Now, I don't know what conversations went on after that. However, just before GenCon 2011 my leader told me that due to incoming employees, my village would have to be relocated. You may notice in one of the pictures that the Imperfect Rioters have placards decrying eminent domain abuse . . . .  Strangely enough, it is only recently that this particular cubicle has become inhabited by someone who isn't 2-dimensional (nor afraid of paper shredders). 


Building models include Dave Graffam's models, and Fat Dragon Games.  Citizenry is courtesy of Imperfect People, by Dryw the Harper.


20 April 2011

Images from a battle

Some time ago I engaged my buddy Josh in a skirmish game of Warlord. Undead (Necropolis) against Mercenaries. I played the Undead.


It was quite fun, even though I lost. I think the best point in the battle was when Josh's sergeant was set upon by two of my wraiths. My wraiths struck true, eliminating the sergeant, but in Warlord, figures in melee get defensive strikes. His sergeant got two, and managed to take out both wraiths as he went down. Dammit!

On the other hand, I have a perfect record in this game. Five games played . . . five games lost.

FYI, the buildings are resin and available at The Miniature Building Authority.

Cardstock Buildings from Dave Graffam

I've been really bad about posting my cardstock builds. My coworkers can testify that I've turn my cubicle into Workshop Villa, complete with citizenry.

This particular building was bashed together to form a country manor, complete with herb garden.

18 January 2011

A Review of WorldWorks Games' Watchtower

Let me start out by saying I love modeling. I've been painting miniature for 22 years; I've built my own wargames terrain and I own lots of HirstArts molds. I've even scratchbuilt a few buildings, using balsa wood, foam board, and cereal box board. I also own about a dozen Miniature Building Authority pieces.

However, since the birth of my son I haven't had nearly as much time to do all the cool stuff I've wanted to do. So, I've needed to make sacrifices. Miniatures aren't necessarily painted to the absolute best of my ability, and I've even recently purchased some closeout Rackham Wolfen as proxies for my Korbolas faction for Warlord. My GenCon fund is not building up as quickly as it did before my son was born, either, so the prospect of major terrain purchases grows dim.

Thus, when I heard about some new card terrain from WorldWorks Games, I was intrigued. They marketed it for Wyrd Miniatures' game Malifaux, but while I liked the idea of semi-modular card terrain, I didn't like how it looked on the table. But, I kept my eyes open for improvements. And so I kept visiting their website, looking at their products, and saying "Hmmm . . . you know maybe this could work . . . ."

In addition to WorldWorks, I've been looking at Fat Dragon Games, too. These two companies seem to be the leaders in this niche, and I like the looks of both their products. Fat Dragon seems "cleaner," and they claim their print-outs don't use as much ink as other companies'. Fair enough, and I'm sure I'll end up getting some stuff from them, too. But, I digress.

I purchased the Watchtower as a test piece. At $8, it's not going to break my budget, and I figured it wouldn't cost that much to print out. Indeed, at my local UPS Store, total cost was just under $10 including tax. One downside of pdf terrain is that it eats up printer ink, and since I have an HP printer with only two cartridges, that means I'd be spending at least that much money if I printed them off myself.

As a side note, I downloaded a couple free buildings in order to practice my cutting skills and make sure this was something I wanted to do before I got too far into it. The buildings don't have interiors, so they are of limited use during gaming, but they'll still be used. After all, not every building needs to be open for models to enter.

What you need:
A sharp hobby knife. I used my x-acto. And trust me, you don't want a cheap imitation.
Metal ruler (you want something with perfectly straight sides).
Cutting mat (I already had this due to my other hobby projects).
Black marker (for edging the model).
Glue. Water in your basic Elmer's will cause the paper to warp. So, either use that PVA glue sparingly, or get a glue with a low water content. I used Aleen's Quick Dry Tacky Glue.

What I downloaded: A zip file containing pdfs of the images and instructions, and a
file containing wallpapers of the watchtower. Cost: $8

Printing: After looking at the files, I realized that the floor tiles are duplicated. This allows for one image to have a 1" grid, while the other image is gridless. This shows the age of the model, as more modern pdfs have layers that can add or subtract those grids. I had thought that I could swap out the base level for a mid-level should I ever get a castle set, but the base has printed areas for the supports, which means I'd have to put more work into my kitbash than I want to right now. I copied the files onto a flash drive, duplicating the necessary walls and roof pages. WorldWorks prints on each page how many copies you need. For the three level tower with roof, 18 pages are required. It would have been nice if they posted that in their description. Sixteen pages are required if you don't print out the roof. With my 18 pdf files in hand, I walked into the UPS Store with my own cardstock, and walked out with well-printed plans. Cost: $9.50

Once I got home, I realized that the printouts were considerably darker than what is shown on my computer screen.

As I started putting the base together, I learned that edging has a bit more technique than what the forums lead you to believe. If you score your lines slightly deeper, it creates a valley that the marker can't get to. Gluing is also an acquired skill. Fiddly bits are a pain. This model is definitely an "intermediate" piece. The battlements gave me all sorts of trouble, and I ended up being about 1/16th of an inch off on one corner. Dangit. The 3-d battlements are cool, but there's gotta be an easier way of putting them together.

The floor support pieces gave me some trouble. There are enough for three levels, which is great, except there are only two levels that are needed. So, I wasted time cutting and gluing fiddly bits that aren't needed.

The support pieces that are glued to the top level also didn't line up correctly. Each is about 1/16th of an inch or so offset, so I had to break out some black paint and cover up the white edges.

The roof piece could have used better instructions, as well. You are instructed to glue a piece underneath the pointed roof, but there are no pictures that show the process.

Overall, I am fairly happy with the model. I spent the better part of four evenings putting it together, and I learned a lot about cardstock modeling. I can definitely see where I rushed the job, and there's definite problems with cardstock modeling if you go on to the next step before the glue is dry! I'm anxious to start another project, although I'm leaning towards something from Fat Dragon, as the models there are supposed to be geared towards the beginning modeler. I think WorldWorks are a bit more advanced. Not that that's bad, but it I can see it being frustrating for someone new to the hobby to get in over his head quickly.

Pictures will be posted later. Right now, I think it's time for novice cardstock modelers to go to bed!


31 October 2010

The Terrain Project - a quick update

Last weekend was a flurry of activity, which will be detailed here later. For the moment, pictures!


25 September 2010

The Terrain Project Part 5: Trees (version 1)

Pipecleaner trees! Hey, they're cheap, they look halfway decent, and did I mention they're cheap? A pack of a hundred pipe cleaners cost something like $2.50 at a craft store. Add another buck-fifty for the inch and a half washers, and $8 for the spray paint I bought . . . and lichen. A small pack ran $5 at the craft store. But a 40% off coupon helped that.

I used the basic steps found here at Terragenesis. The first difference was that I started with black pipe cleaners. The second is that I used textured spray paint to coat them. This gave a rough appearance that eliminated a lot of the pipecleaners' fuzziness. The paint glooped together the fibers, so they look irregular and pretty decent.

I made the trees and glued them to the washers (you can see those in the first picture). The washers serve two purposes: first, they are heavy enough to keep the trees upright after I add the lichen as foilage. Two, they'll work with my idea of using magnets on the base so I can more the trees around as needed. More on this later.

Here are the trees after spraying:

First step was a heavy drybrush of brown (I used Americana Asphaultum, a dark brown). Yes, I know tree bark isn't usually brown. But this will be covered up later. Plus, a lot of the black base color showed through.

Then, a highlight of a grayish color. I used Folk Art's Barn Wood. I did this until I was happy with the texture. Still lots of the base black, but I like the effect.


Now, the base! Version 1 was cut from 1/8" MDF using my Dremel tool. I used some adhesive magnetic strips to attach the trees, and using a washer as a guide, sculpted around the magnets to hide the seams.
Not bad . . . .
Not bad at all!
I used craft glue (PVA, but better than Elmer's) to attach the lichen to the trunks. The bases of the trees are washed with PVA glue and sprinkled with fine talus rock. I also added in some lichen bushes for some additional cover. The base was painted with a mixture of raw umber and PVA glue, and sprinkled with flock (earth colored). Some areas got extra treatment with grass flock.

Not being content with the first version of the base, here's version 1.1. I used the Dremel again, cutting two bases. The first base was the usual, the second was smaller and has two holes cut in it that will fit the washers. I put the magnets down inside the holes, and the level is just about right . . . the washers stand a little high (about a millimeter), but I don't use up all my epoxy putty!

Here are a couple shots of the completed trees. I still have to finish the bases (hopefully that will be this week).


19 September 2010

The Terrain Project Part 4: Final Steps

I toyed with the idea of adding a picture of the mat drying . . . but that would be as exciting as watching grass grow.

Instead, here's the next step: I trimmed the edges of the mat that would touch the side boards. I actually did this with the open side, too, but it's far more important to trim these edges. Once you secure the board to the base, if there's any overlap the mat will be pushed up, and there's no way to get it down. Guess who found this out the hard way? So, a very close, tight cut to make sure there aren't going to be any ripples in the mat.


Then, I started attaching the side boards. I had previously cut them, with only one mishap due to me forgetting that a board has two ends (don't ask). Here's the lengths:
2 @ 49 1/2 inches
4 @ 24 inches

If you forget that the long sideboard is supposed to cover the ends of both smaller pieces, you end up with one at 48 3/4" . . . but I digress.

I initially attached the board to the base with a thin nail. I needed to drill out the holes where the screws would go, but it's way safer to drill both holes as one.

I used 2 1/2" screws, and put three on each short side, with five on each long side, plus one on the very ends to connect the side boards.


I had to take a break because Mrs. Workshop came home with the guppy. By the time I made it back to the project, it was dark. But that wouldn't stop me! Almost there!


I sanded the rough areas of the furring strips, along with taking off the corners that could give splinters. I'll hit the boards with the shop vac later to pick up the sawdust.

And here's the final product. Sixteen square feet of battle-ready goodness.


What I learned:
1) I probably didn't need 5/8" particle board. It's pretty heavy.
2) Patience is good. I got lucky in finding the mat at 40% off. But, if I had a little more patience I wouldn't have made the wrong cut. Plus, I could have been a little better with the drill.
3) Find good stopping points, because your wife will invariably come home in the middle of you handling the drill and want your help unloading the car.

What's next? Trees and hills. And felt rivers.

18 September 2010

The Terrain Project Part 3: I didn't cut any fingers off!

On a quiet afternoon, when Mrs. Workshop took the guppy to visit family, I started my game table. The initial supplies: two 2'x4' pieces of particle board, furring strips, and the Woodlands Scenics mat (summer color).


First, I cut the mat so there was a little bit of overlap on all four sides of each piece of particle board. I'll trim it up later.


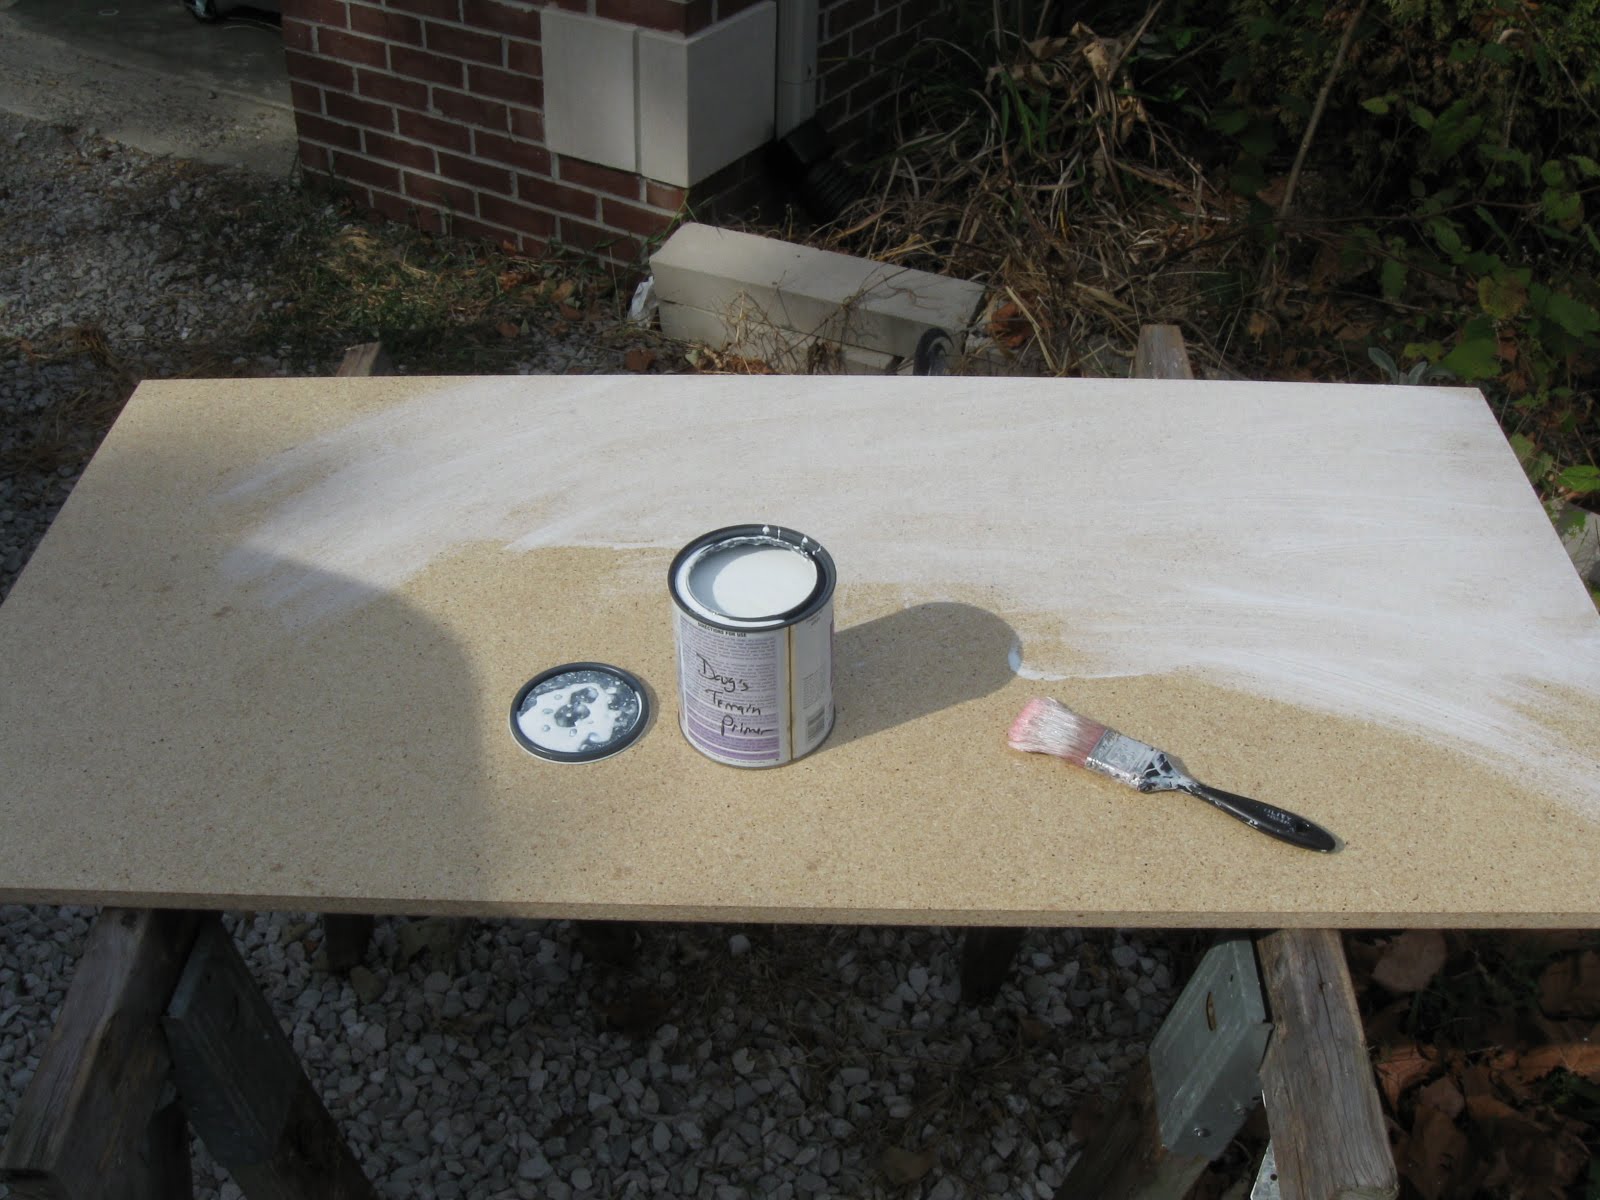
Then, as per the directions on the jar of adhesive I'm using to glue the mat to the board, I primed the board. This is so the adhesive has something better to cling to than porous chips of wood.


Yes, I did both.

Once the primer was dry, I used a cheap foam brush to paint the adhesive to the board, as well as the back of each piece of mat, being careful to not get the glue on the green side of the mat, and to make sure the corners and edges of both the mat and the board were covered. I was less concerned about the center, but everything got a good covering of adhesive. I let the glue dry for a little bit, and draped the mats over the boards, smoothing with a heavy cookbook.

While I was waiting for the glue to dry (I'm going to err on the side of caution and let them sit for a couple hours, I started premeasuring the furring strips. Four pieces at 24 inches, two at 49 1/2 . . . but since I didn't do math right, I had to adjust slightly. Oh well, nothing's perfect. And having one piece at 48 3/4 with a side piece of 24 3/4 isn't going to kill anyone.

One item of note: Next time, look for thinner material. That particleboard is friggin' heavy. Perhaps thinner, with a frame on the underside of those furring strips I'm using. Wood glue + screw nail that thing down . . . yeah, I'll have to remember that for next time.