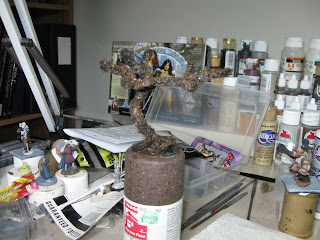
 Pipecleaner trees! Hey, they're cheap, they look halfway decent, and did I mention they're cheap? A pack of a hundred pipe cleaners cost something like $2.50 at a craft store. Add another buck-fifty for the inch and a half washers, and $8 for the spray paint I bought . . . and lichen. A small pack ran $5 at the craft store. But a 40% off coupon helped that.
I used the basic steps found here at Terragenesis. The first difference was that I started with black pipe cleaners. The second is that I used textured spray paint to coat them. This gave a rough appearance that eliminated a lot of the pipecleaners' fuzziness. The paint glooped together the fibers, so they look irregular and pretty decent.
I made the trees and glued them to the washers (you can see those in the first picture). The washers serve two purposes: first, they are heavy enough to keep the trees upright after I add the lichen as foilage. Two, they'll work with my idea of using magnets on the base so I can more the trees around as needed. More on this later.
Here are the trees after spraying:

First step was a heavy drybrush of brown (I used Americana Asphaultum, a dark brown). Yes, I know tree bark isn't usually brown. But this will be covered up later. Plus, a lot of the black base color showed through.

Then, a highlight of a grayish color. I used Folk Art's Barn Wood. I did this until I was happy with the texture. Still lots of the base black, but I like the effect.

Now, the base! Version 1 was cut from 1/8" MDF using my Dremel tool. I used some adhesive magnetic strips to attach the trees, and using a washer as a guide, sculpted around the magnets to hide the seams.
 Not bad . . . .
 Not bad at all!
 I used craft glue (PVA, but better than Elmer's) to attach the lichen to the trunks. The bases of the trees are washed with PVA glue and sprinkled with fine talus rock. I also added in some lichen bushes for some additional cover. The base was painted with a mixture of raw umber and PVA glue, and sprinkled with flock (earth colored). Some areas got extra treatment with grass flock.
 Not being content with the first version of the base, here's version 1.1. I used the Dremel again, cutting two bases. The first base was the usual, the second was smaller and has two holes cut in it that will fit the washers. I put the magnets down inside the holes, and the level is just about right . . . the washers stand a little high (about a millimeter), but I don't use up all my epoxy putty!
Here are a couple shots of the completed trees. I still have to finish the bases (hopefully that will be this week).


No comments:
Post a Comment